
KUKA KR10 Axis 4 Reducer 00-200-827 Abnormal Noise and Backlash Repair
When the KUKA KR10 R1420 Axis 4 reducer 00-200-827 exhibits abnormal noise, vibration, backlash, or positioning deviation, it is necessary to check lubrication, bearings, gears, and motor connections.
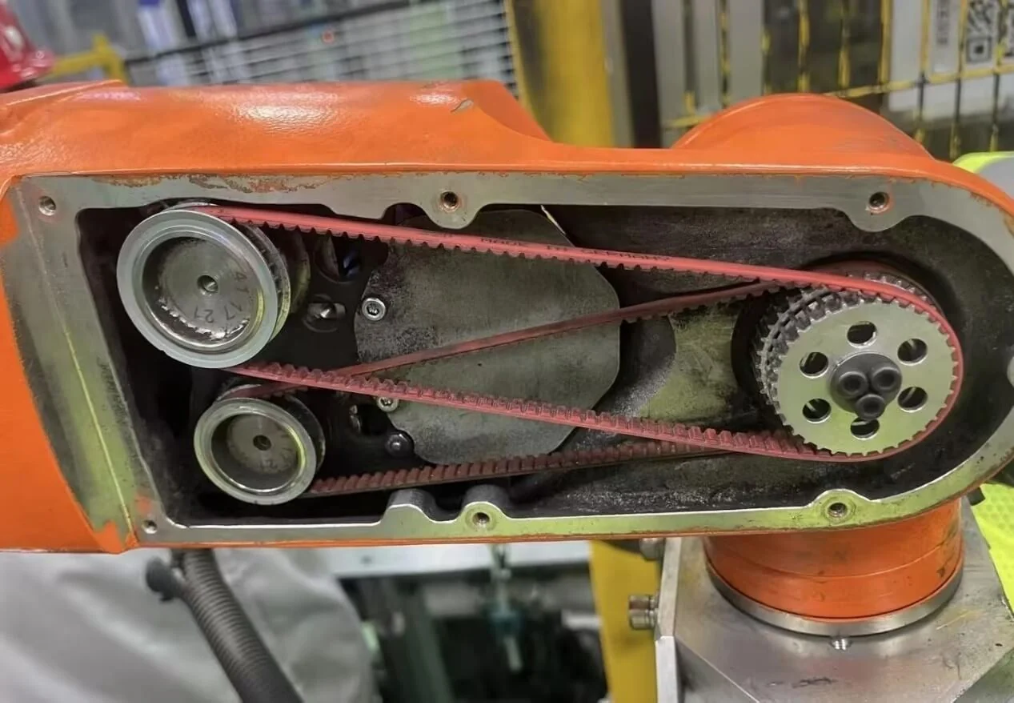
The 00-200-827 is used for the Axis 4 transmission of the KUKA KR10 R1420 robot. Wear on the reducer can cause joint noise, reduced repeat positioning accuracy, and program trajectory deviation.
The key to on-site diagnosis is first determining the fault scope, then deciding on the repair target. During inspection, record alarms, axis number, robot posture, and reproduction conditions to avoid replacing parts based solely on a single alarm.
- Common Fault Manifestations
- Continuous or periodic abnormal noise during Axis 4 operation.
- Impact during direction reversal, with noticeably increased backlash.
- Robot repeat positioning deviation or unstable trajectory.
- Reducer oil leakage, temperature rise, or joint jamming.
- Possible Causes
- Insufficient lubrication, contaminated oil, or seal damage.
- Wear on gears, bearings, or internal transmission components.
- Loose motor installation or connecting parts.
- Collision, overload, or long-term high-load operation.
- Abnormal mechanical zero point or load parameters.
- On-site Troubleshooting Sequence
- Record the direction, speed, and angle at which the abnormal noise occurs.
- Run at low speed in forward and reverse directions and check backlash and temperature rise.
- Check for oil leaks, fastening bolts, motor, and connecting components.
- Rule out motor, brake, and encoder issues.
- After confirming internal wear, disassemble for inspection or replace the 00-200-827.
- Verification Before Replacing Parts
Verify the complete KR10 model, R1420 version, installation axis position, reducer part number, reduction ratio, and mechanical interface. Record the mechanical zero point before disassembly.
Similar external appearance does not mean parts are directly interchangeable. Before procurement, provide the complete equipment model, original part nameplate, interface photos, controller model, and alarm information.
- Post-Repair Verification
After installation, adjust lubrication and fastening status, restore the mechanical zero point, and check backlash, noise, temperature, TCP, and the original program trajectory.
After repair completion, also save the test results, replaced part numbers, and final parameters to facilitate tracking by subsequent maintenance personnel.
- Summary
When handling such faults, troubleshoot in the order of alarm records, power supply and connections, feedback lines, mechanical load, and the component itself. Only after external conditions are confirmed normal can you further determine if the target component requires repair or replacement.
Industrial Robot Repair Hotline: +86 18122009539
Contact Repair Engineer: +86 18122009539