
Yaskawa Robot Repair for a Blank Teach Pendant
Diagnose a blank Yaskawa robot teach pendant by separating pendant, cable, controller power, connection, and startup sequence faults.
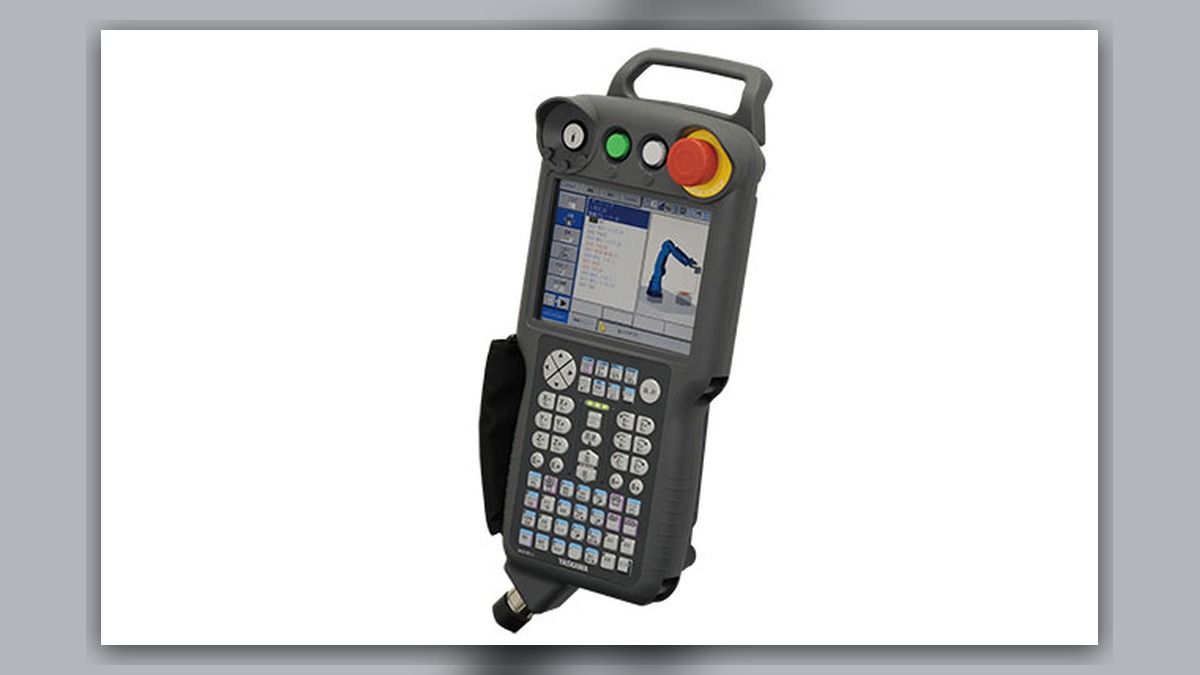
A Yaskawa robot repair investigation for a blank teach pendant should begin by separating a display problem from a pendant power, cable, connector, controller power, or startup fault. Before disconnecting equipment, record the robot and controller models, the exact startup sequence, indicator status, recent maintenance, and whether the fault is continuous or intermittent. A dark screen alone does not prove that the pendant is damaged because the controller may not be supplying power or completing the stage required for pendant operation.
Symptoms and Equipment Scope
This diagnostic approach applies to Yaskawa Motoman industrial robot systems in which the controller appears to receive incoming power but the connected teach pendant remains blank, restarts unexpectedly, or fails to reach its normal operating display. Controller-specific names, connector locations, startup indicators, and service procedures vary, so the installed controller manual and electrical documentation remain authoritative.
This article does not cover a pendant that starts normally but has inaccurate touch input, failed hard keys, a defective enabling device, or an emergency-stop circuit that will not reset. Those symptoms require different diagnostic branches. It also does not assume that a blank pendant and a controller that is completely dead have the same cause.
Information to Record First
Record evidence before cycling power or moving cables. Intermittent faults may disappear temporarily after a restart, making the original conditions important for diagnosis.
Complete alarm code and full text: Record any message shown before the screen became blank.
Date and exact time: Note when the event occurred.
Faulted axis: Record an axis only if an associated axis alarm was present.
Robot position/posture: Note the position if the failure occurred during operation.
Program step or motion: Identify the active job or command when known.
Actual speed and load condition: Record the operating condition without estimating missing values.
Reset result: State whether a normal reset changed the symptom.
Time until recurrence: Record whether the pendant remained operational after restart and for how long.
Related power, communication or feedback alarms: Preserve the full event history rather than only the final message.
Also record the robot model, controller model, pendant model, component part numbers, hardware revisions, visible indicator states, and any work recently performed inside the cabinet or near the pendant cable.
Safety and Preparation
Apply the site lockout and energy-control procedure before opening the controller, handling internal connections, or disconnecting the pendant. Stored electrical energy and unexpected robot motion can remain hazardous after normal shutdown. Internal inspection and energized diagnosis should be performed only by suitably competent personnel following the applicable Yaskawa operating information and site safety procedure.
Do not repeatedly bend, twist, or reconnect a damaged pendant cable while the system is energized. Do not bypass emergency-stop, enabling-device, door-interlock, or other safety circuits to obtain a display. If contamination, impact damage, overheating, or exposed conductors are visible, isolate the equipment and determine the required repair scope before attempting another startup.
Yaskawa Robot Repair Diagnostic Sequence
- Confirm the power-up boundary. Determine whether incoming power reaches the controller and whether cabinet indicators, fans, contactors, or other normal startup signs are present. The inspection target is the point at which the startup sequence stops. If the entire controller is inactive, investigate the approved external supply, isolation devices, protection devices, and controller power path before focusing on the pendant. If the cabinet starts but the pendant remains blank, continue with pendant-related checks.
- Review alarm history and operating conditions. If controller diagnostics remain accessible through an approved service method, preserve the event history before clearing alarms. Look for an earlier power, communication, safety, or startup event that may explain why the pendant did not initialize. A later blank screen is an observation, not necessarily the initiating fault.
- Inspect the pendant and cable externally. With power safely isolated, examine the housing, screen, strain relief, cable jacket, and connector for impact damage, crushed areas, contamination, bent hardware, looseness, or heat discoloration. Pay particular attention to areas that flex during teaching. Visible damage supports further cable or pendant testing, but an undamaged exterior does not confirm electrical continuity.
- Check connection integrity. Verify that the pendant connector is fully seated according to the controller documentation and that no unauthorized adapter or modified connection is present. Inspect only the accessible connector features permitted by the maintenance procedure. If a connection was disturbed during recent service, compare its orientation and locking condition with the applicable documentation rather than forcing it into position.
- Separate pendant-side and controller-side possibilities. Professional testing may be needed to determine whether the fault follows the pendant assembly or remains with the controller interface. Any substitution must use a compatible unit matched by exact model, part number, hardware revision, connector layout, and supported controller configuration. A physically similar pendant should not be assumed compatible.
- Evaluate intermittent conditions without increasing risk. Use the event history, inspection evidence, and maintenance records to determine whether the failure correlates with cable position, cabinet temperature, recent cleaning, vibration, or startup timing. Observation during operation may be performed only by competent personnel under controlled conditions and approved safety procedures. Do not manipulate a suspect cable during robot motion merely to reproduce the fault.
How to Distinguish Similar Causes
A controller with no normal startup indications points toward the incoming supply or controller power path rather than an isolated display failure. A pendant that briefly illuminates and then restarts may require investigation of supply stability, connection integrity, or internal pendant electronics. A display that remains visible while keys or touch input fail belongs to an input-device diagnostic path. A fault that changes with cable routing may indicate a cable or connector issue, but controlled testing is still required before condemning a component.
When Repair or Replacement May Be Considered
Repair may be considered when inspection or bench testing identifies a serviceable pendant, cable, connector, controller power section, or communication interface fault. Replacement may be more appropriate when damage cannot be repaired reliably or when a correctly matched service part is required. Neither decision should be based on the blank display alone.
For broader controller and robot support, the industrial robot repair service overview is available at https://autonews.best/services. ZHB is an independent industrial robot inspection, repair, and maintenance service provider that also supplies parts to overseas customers; it does not imply manufacturer authorization.
Information Required for a Repair Inquiry
A useful repair inquiry should include the Yaskawa robot model, controller model, pendant model, complete alarm code and alarm history, component label and part number, fault conditions, recent maintenance, reset behavior, and clear photographs of the pendant, cable, connectors, controller identification label, and visible damage. State whether the controller starts normally and whether the pendant is always blank or fails intermittently.
Verification After Repair or Replacement
After approved work is completed, confirm that all connectors are secured, guards and cabinet covers are restored, tools are removed, and safety devices remain functional. Start the system according to the manufacturer procedure and verify that the pendant completes initialization without new alarms. Check display stability, permitted input functions, operating-mode indication, and communication with the controller. Any motion verification must use a controlled area, an approved program, appropriate speed and load conditions, and qualified personnel. Do not repeat a hazardous event solely to prove that an intermittent fault has disappeared.
Conclusion
Effective Yaskawa robot repair for a blank teach pendant depends on identifying where the startup sequence stops. Controller power, connection integrity, cable condition, pendant electronics, and controller interfaces must be distinguished using recorded evidence and configuration-specific documentation. Confirm the exact equipment identity and test results before deciding to repair or replace any component.